Giant Flower Textiles as Wall Art
Have you ever wanted to hang fabric as art on your wall? Here’s a tutorial for how to transform cotton poplin yardage into stretched art!

How to stretch your fabric as wall art!
Materials:
Stretcher bars (available at any art supply store. I got mine at Ben Franklin Maui.)
White or off-white muslin (I used off-white curtain fabric from IKEA)
Staple gun and plenty of staples
Stretcher pliers (not absolutely necessary but it makes for a tighter stretch)
Rubber Mallet (For pounding stretcher bars together. You can use a hammer but soften it with a towel so you don’t dent the stretcher bars, which can be quite soft.)
Fabric scissors
What size stretcher bars? I measured the flowers and picked stretcher bars a few inches longer and wider than the bloom to have a nice border. The flower may grow a bit when you stretch it, so leave some wiggle room in your measurements. Note: you want at least 2 inches of fabric all around the outer edges of the stretcher bars to get a good grip on the fabric with the stretcher pliers.
Prepare your space: Have a large, clean surface to lay the flower on, face down. I laid a big piece of sheeting on a table to protect the fabric.

Step 1: Build the frame
Put the stretcher bars together. Use a rubber mallet to pound them into each other. Square the stretcher bars in a door frame.
Step 2: Cut the muslin
Why use muslin? We are using it to make the art less transparent. The cotton poplin flower panel is a bit thin on its own and you may see the shadow of the stretcher bars along the edges.
Cut the muslin roughly 2 inches longer than the stretcher bars on all edges, (or put another way: roughly 4 inches longer and 4 inches wider than the total stretcher bar dimensions.)
Lay the stretcher bars on top of the muslin, well centered. If your stretcher bars have a flat side, that should be away from the fabric.

Step 3: Stretch the muslin fabric
Pick a side to begin. This will be side A. Place 2 staples in the MIDDLE of side A (on the back surface of the stretcher bars) holding the fabric in place. The staples should be fairly close together, maybe an inch an a half apart. We are doing 2 staples because if you do just one, and then stretch it from the other side, you could put too much pressure on the one staple and it could rip the fabric.
Now go to the side opposite from side A. This will be side B. Stretch the fabric as hard as you can without being overly vigorous (remember we don’t want to rip the fabric)! Place two staples in the middle, opposing the staples you just did.
Now go to the 3rd side (side C) and do the same.
Now go to the 4th side, which opposes side C (side D) and do the same.
You fabric should be pulling into a cross shape.
From here forward, you will be repeating this pattern, moving in the ABCD sequence, except you are going to place one staple to the left and one to the right of your initial staples, pulling the fabric diagonally away from the imaginary center point of the canvas as you do.
It is critical that you evenly go through the ABCD sequence to always balance the tension of the side you just stapled by moving to its opposing side. It is also critical to be adding staples to all 4 sides before moving onto the next round. Make sure you are pulling everything evenly to keep any dipples or wrinkles from happening.
You will continue doing this until you get near the corners of the stretcher bars. I like to leave a little space near the end, so I can fold the fabric like you would fold a fitted sheet to a bed, and for that you need a little slack at the corner to tuck it in. After it is folded, staple the corner, and staple any remaining flaps to the back to make it neatly finished.
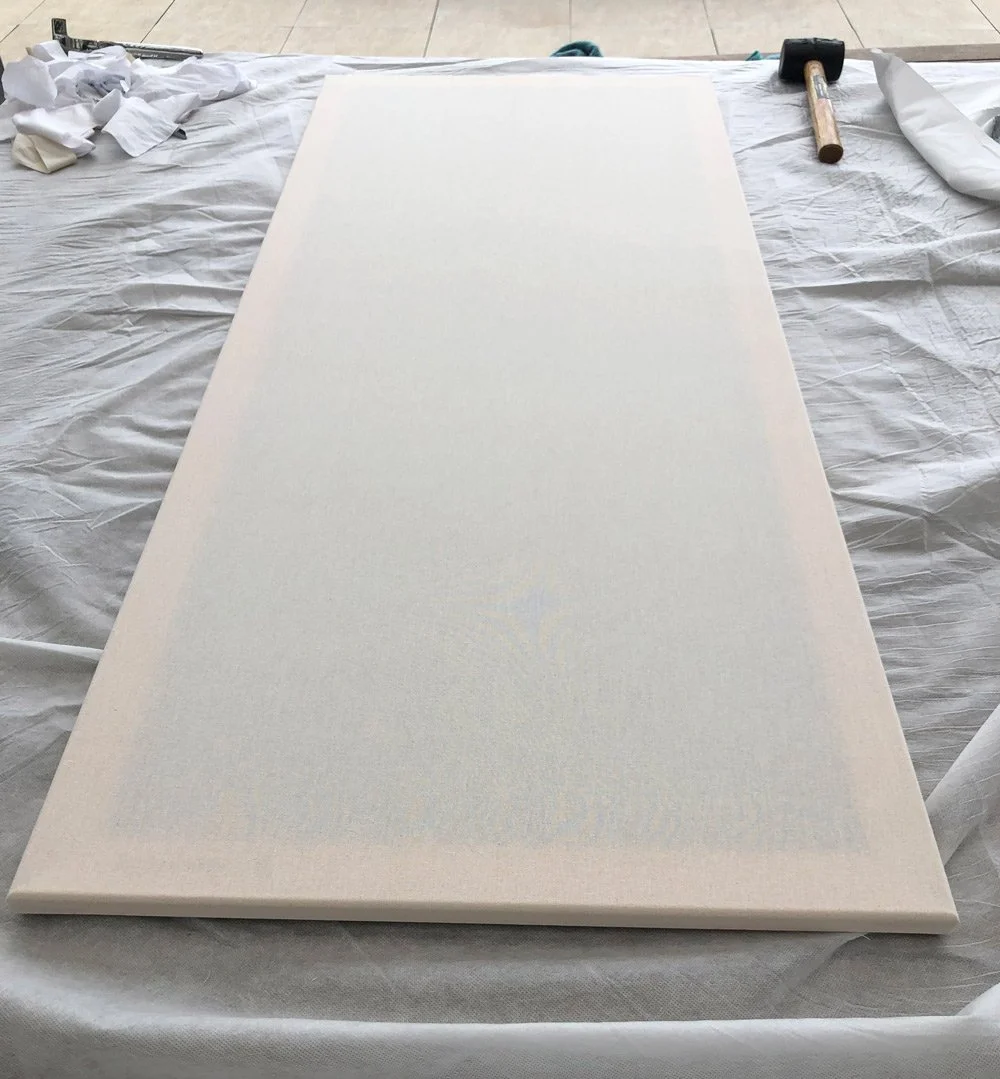
It will look like this when finished:
Step 4: Stretch the flower
Repeat the entire process above with the flower cotton poplin now, on top of the muslin covered frame.
You are finished! You can add hanging wire if you’d like, or just perch the stretcher bars on a nail to hang it.
Pro Tip: If your stretcher bars warp after they are stretched, you can nail a narrow piece of wood across the center as a brace.


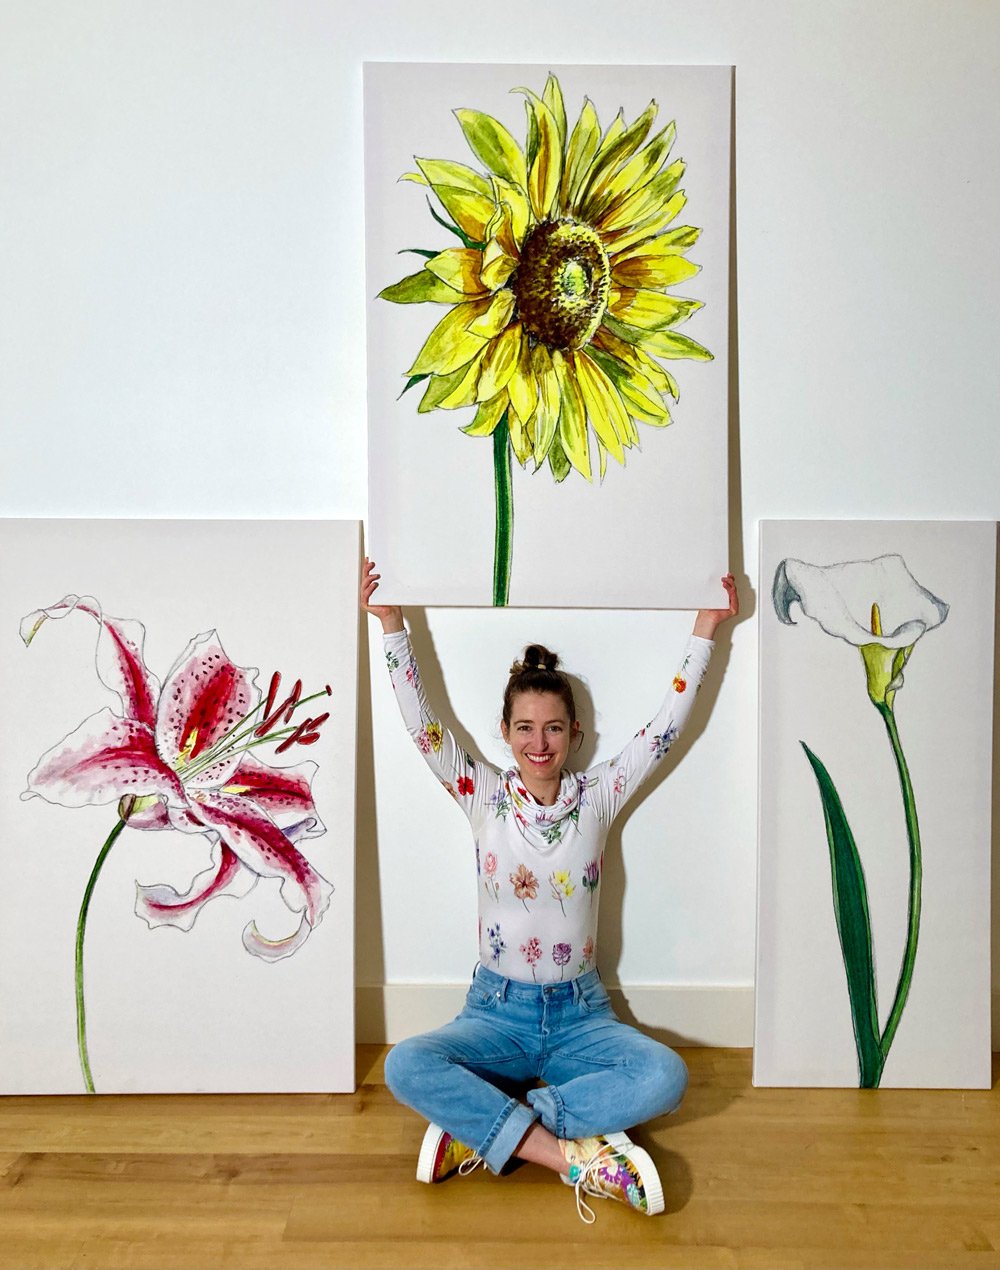

Fabrics pictured in this tutorial: Sunflower, White Calla Lily, and Star Gazer Lily Giant Flower Panels. I am wearing the Rows of Flower Textile in Bamboo Lycra, sewn into a Little Lizard King Benicia Cowl Neck.
Thanks for reading and I hope you enjoy turning fabric into art for your home!