Maker Feature: Peony 2 Giant Flower Dress by Silvia Liu

Hello Textile Lovers! It’s Sil here and I’m back for another post in the Giant Flower Series that I’ve been working on. I had a lot of fun making the Carnation Dress and I’m so happy to finish sewing another gorgeous flower. This time, I used the Peony 2, I think it looks so beautiful with its magnificent petals spraying in all directions.

The Peony 2 fabric
My inspiration came while I was looking up Halloween costumes back in October. These morph suits with flower heads are so funny! Okay, I don’t think I’ll ever sew a morph suit, but the flower head is an idea I can adapt. I’ll use a giant flower flower and make it into a mini cape-collar that goes all the way around the neckline. I used a pattern that’s still in print, the Vogue 1579, which is a Badgley Mischka design.

Flower head morph suits. That’s eye catching!
So I looked through my collection of Julia’s Giant Flowers. The Peony 2 panel has nice wavy lines created by its petals. It’s a size that would fit around my head and neck, falling to mid-chest and mid-back and not so large that it’ll hit my waist, or too small that it might lose its effect. I found this fringed Italian fabric (cotton/polyester/acrylic mix) in my local fabric store, and thought the colours co-ordinate well with the peony. And the fringe adds a bit of tactile interest.

Italian fringing fabric in shades of white, pink and fuchsia.
Now I’m going to be a bit technical and go into the actual process of making my dress with lots of construction pics. If you’re more interested in the final outcome, you can scroll to the end of the post.
So the first and most important step was how to position the fabric to cut the cape pieces from. I decided to use the bottom of the flower as the front of the cape and the top as the back. I traced the cape pieces onto tracing paper, opening up the fold lines. I allowed extra space on the bottom. I then placed them on top of the peony fabric and played around with it until I was happy with how the petals defined the cape edges. One point to note here is that the cape shoulder/side seams of the front and back pieces have to be equal lengths from the neck edge, so that they can be joined together in a smooth line once stitched together on the sides.

Laying the translucent traced pattern pieces on top of the peony.
I then cut out the fabric pieces of the cape, but left space on the bottom, only cutting roughly around the petal edges. I then pinned the lining fabric (uncut) under the cape piece, marked seam allowance around the undulating petal outlines, and then cut both the cape and lining as one. I repeated for both pieces of the cape. If your lining has a right and wrong side, take care to place it so that the right side faces DOWN, so that when the cape and lining pieces are attached, the wrong sides of the cape and lining are touching.


Cutting out the cape outer and lining pieces.
The shoulder/side seams of the cape outer (peony fabric) and lining pieces were stitched separately. Then once they were done, I pinned the wrong sides together, matching the neckline and bottom edges. I stitched the bottom edge AT THE PETAL LINES, notched the seam allowance, and turned it back to the right side. Then I topstitched around the bottom edge for a sharper line.

Constructing the cape.
I then assembled the dress bodice. At this stage, as per the pic above, the cape was just placed onto the dress bodice for pictures. I hadn’t attached it yet because there was a problem. I’ve read several other maker’s experiences with this pattern (Vogue 1579) and learned that there is a constructional error where the cape is attached to the dress. I can see why from this illustration:

Base illustration was taken from instructional leaftlet included in Vogue 1579.
It is not possible to sew the cape outer to dress outer, and cape lining to dress lining respectively. Well, it IS possible, but if you do that, the cape will be inside out such that the peony will be facing your body and the cape lining will be on the OUTSIDE. The makers shared that they just attached the cape to the bodice and leave an edge with exposed seam allowance between the cape and the dress, on the underside. It won’t be seen when worn. But I was not satisfied with this solution.

My way of attaching the cape and bodice outer and lining pieces together.
I sewed it so that I attached the cape outer, dress outer and dress lining pieces together to form the neckline, THEN slipstitched the cape lining by hand, turning in the seam allowances to hide them. That makes a clean edge at every seam, even if it’s on the underside of the cape. The main point is, DO NOT BASTE the cape outer and lining pieces together at STEP 13, so that the outer and lining pieces can be sewn separately.


It was like a puzzle that finally came together in a different way.
With that out of the way, the construction of the rest of the dress was fairly straightforward. Sewing the skirt back vent was a little tricky for me, as I’m not that experienced in sewing finer details like that. I also got the skirt lining mixed up and had to unpick a lot. Luckily I cut the lining pieces correctly at the start while laying out the pattern pieces – the right/top side of the lining fabric faces and touches your body, and they have to be cut, arranged and stitched accordingly. I also had to cut away the fringes at the seamlines, around the back vent and along the side zip area, which added extra time but was worth it.

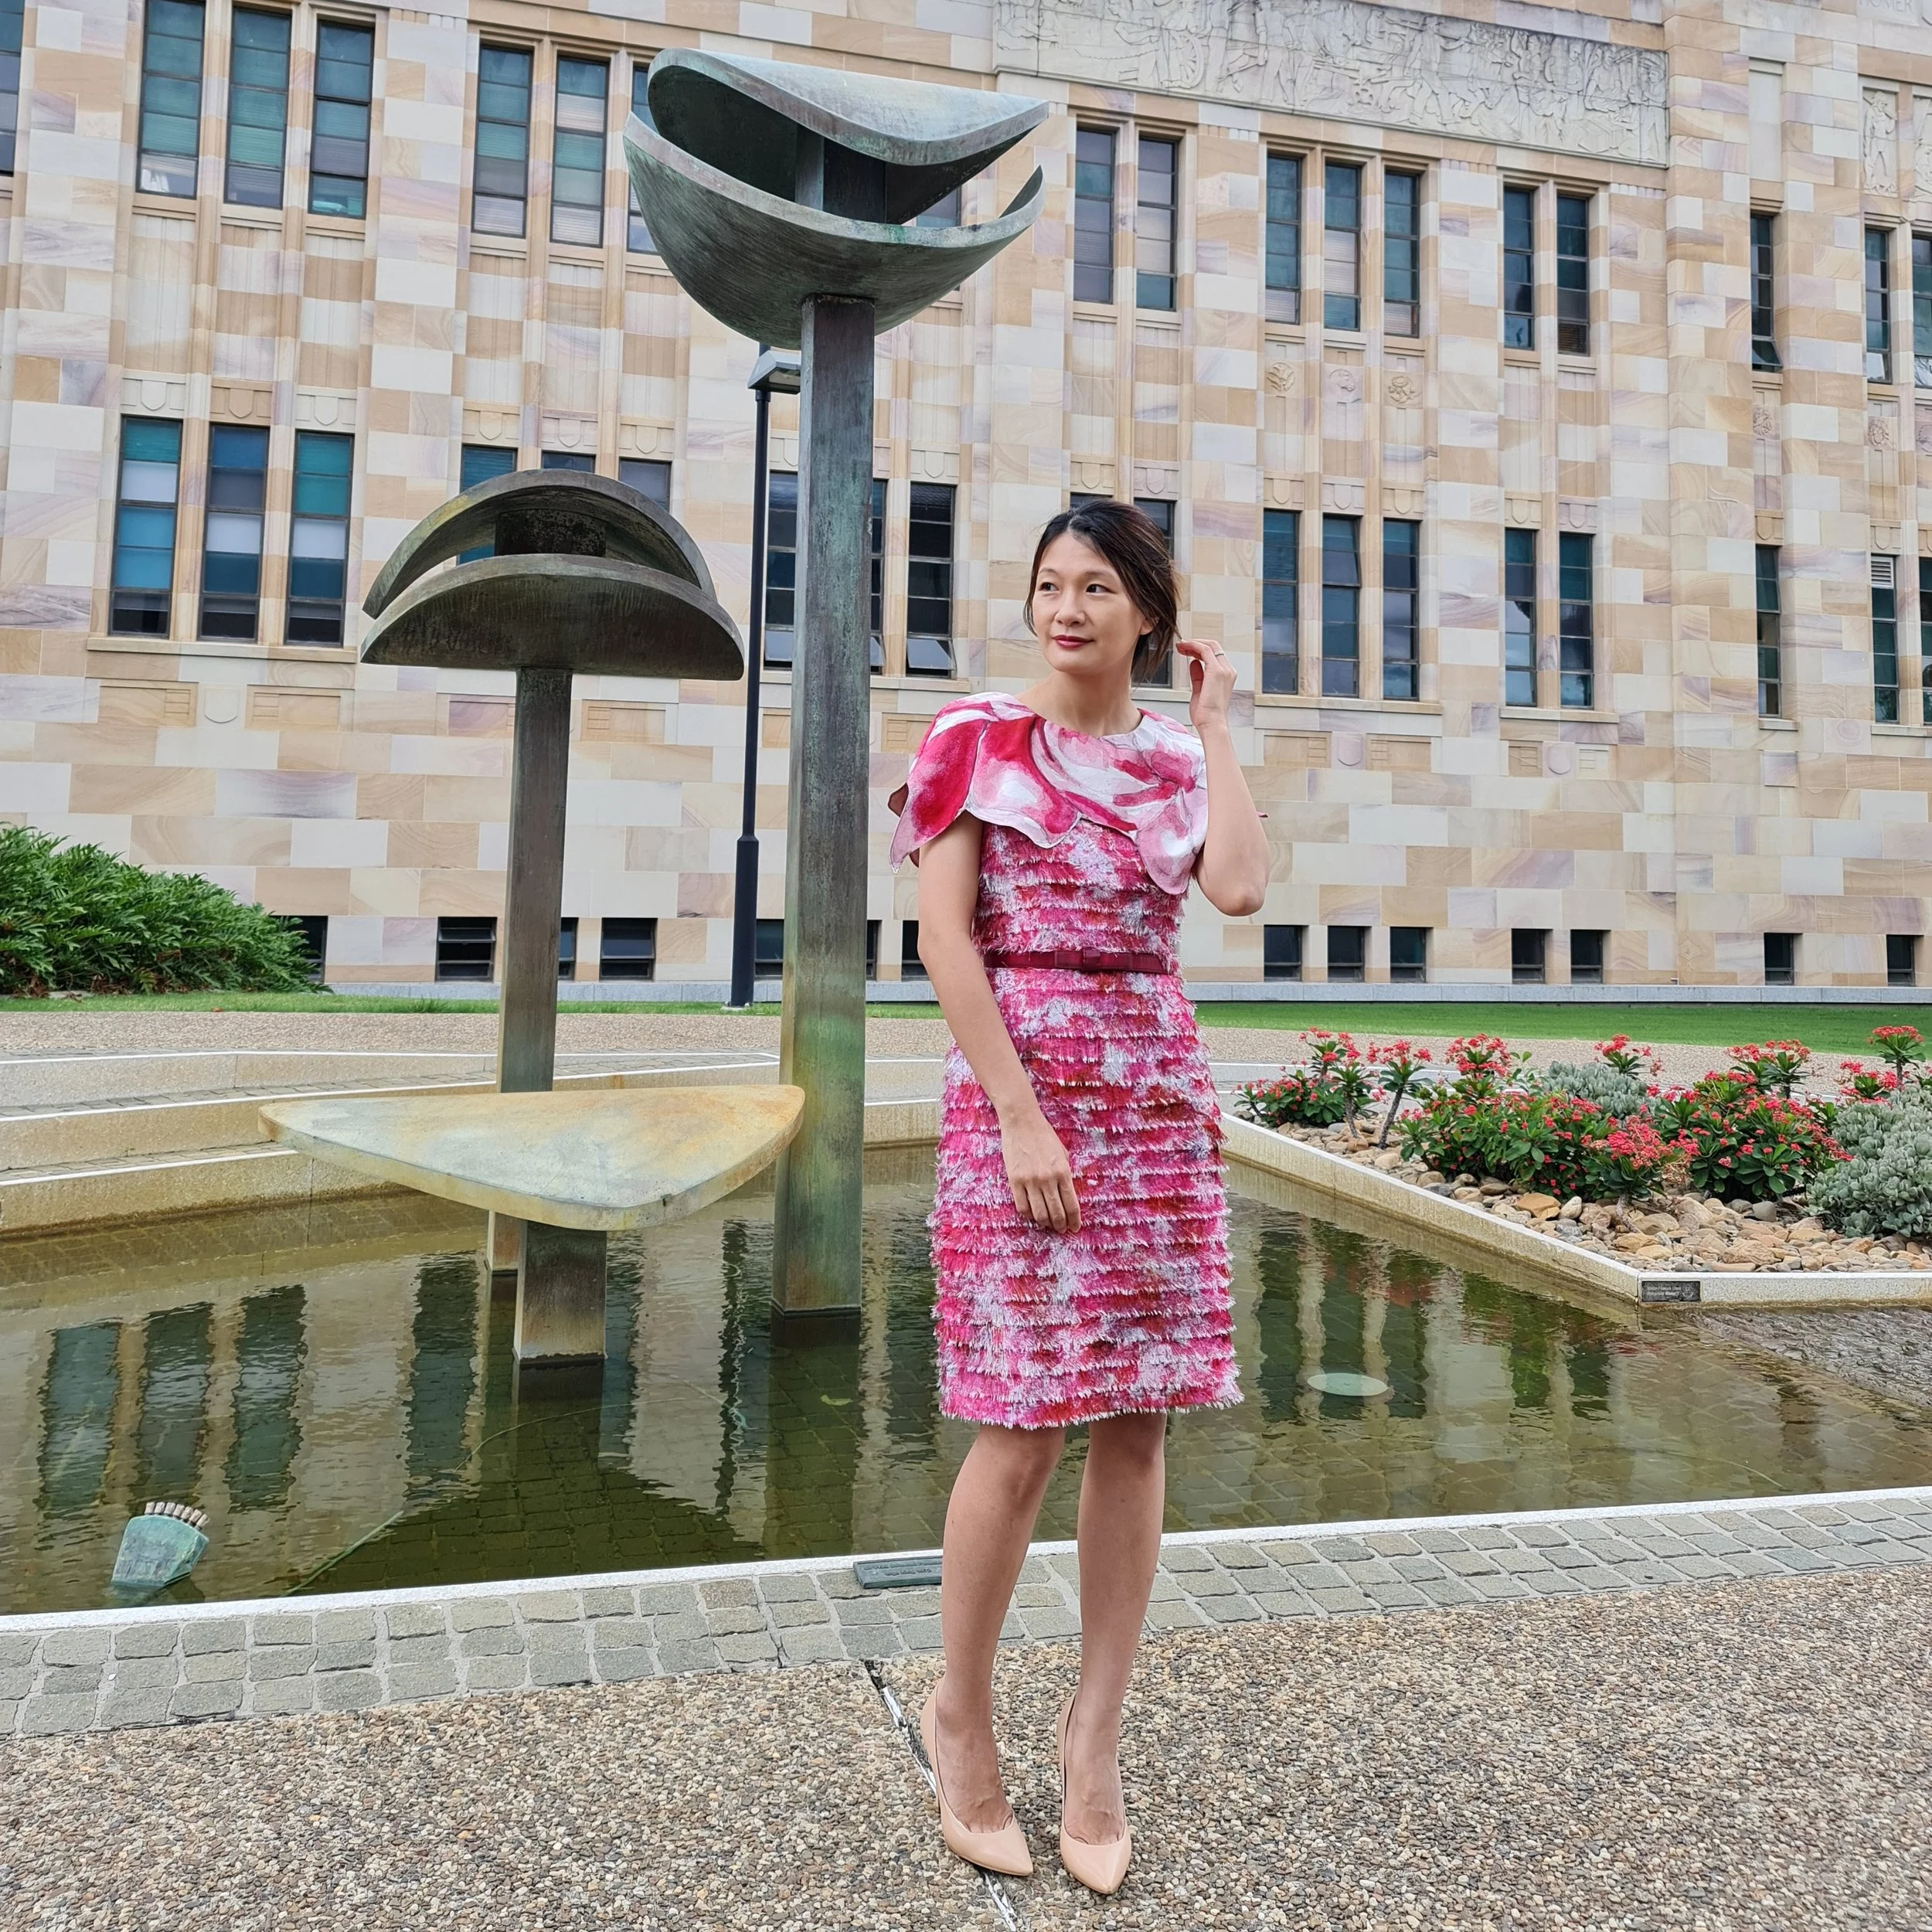
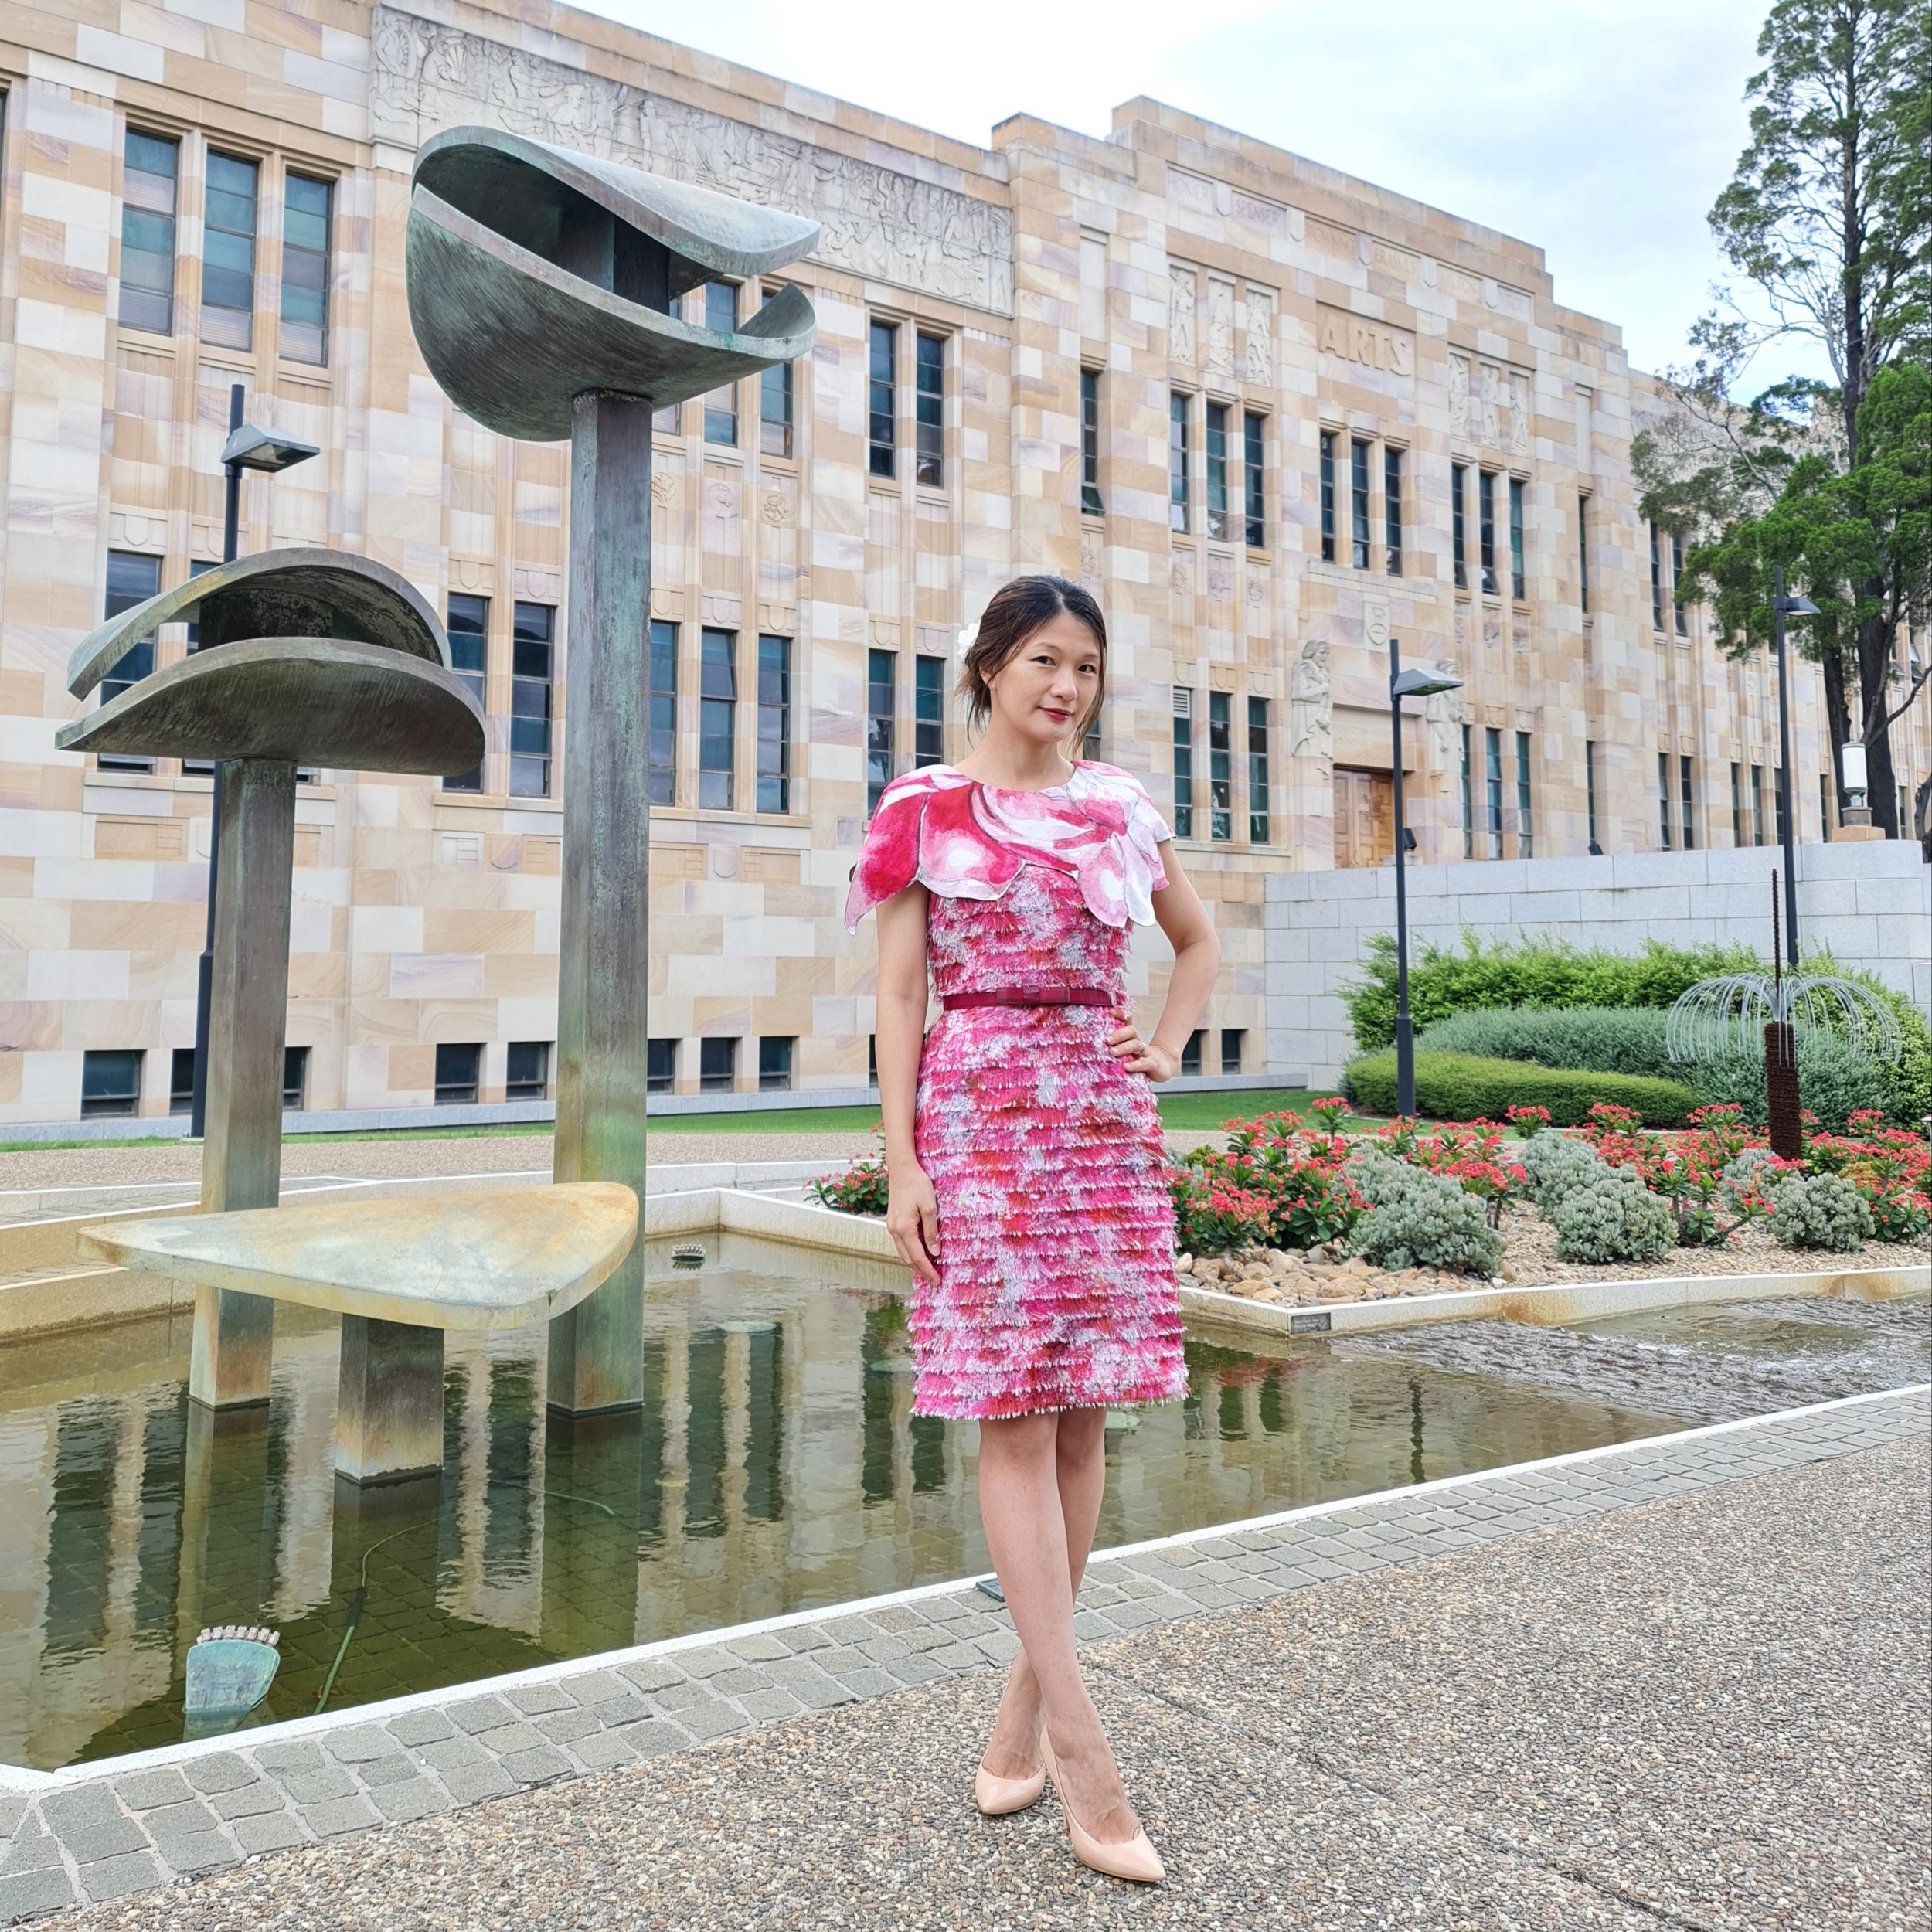
Finished dress using Vogue 1579, with the Peony 2 as the mini cape-collar.
If you made it this far…you must love the constructional side of sewing, haha! Thank you for bearing with me. Here are some final photos of me wearing it.


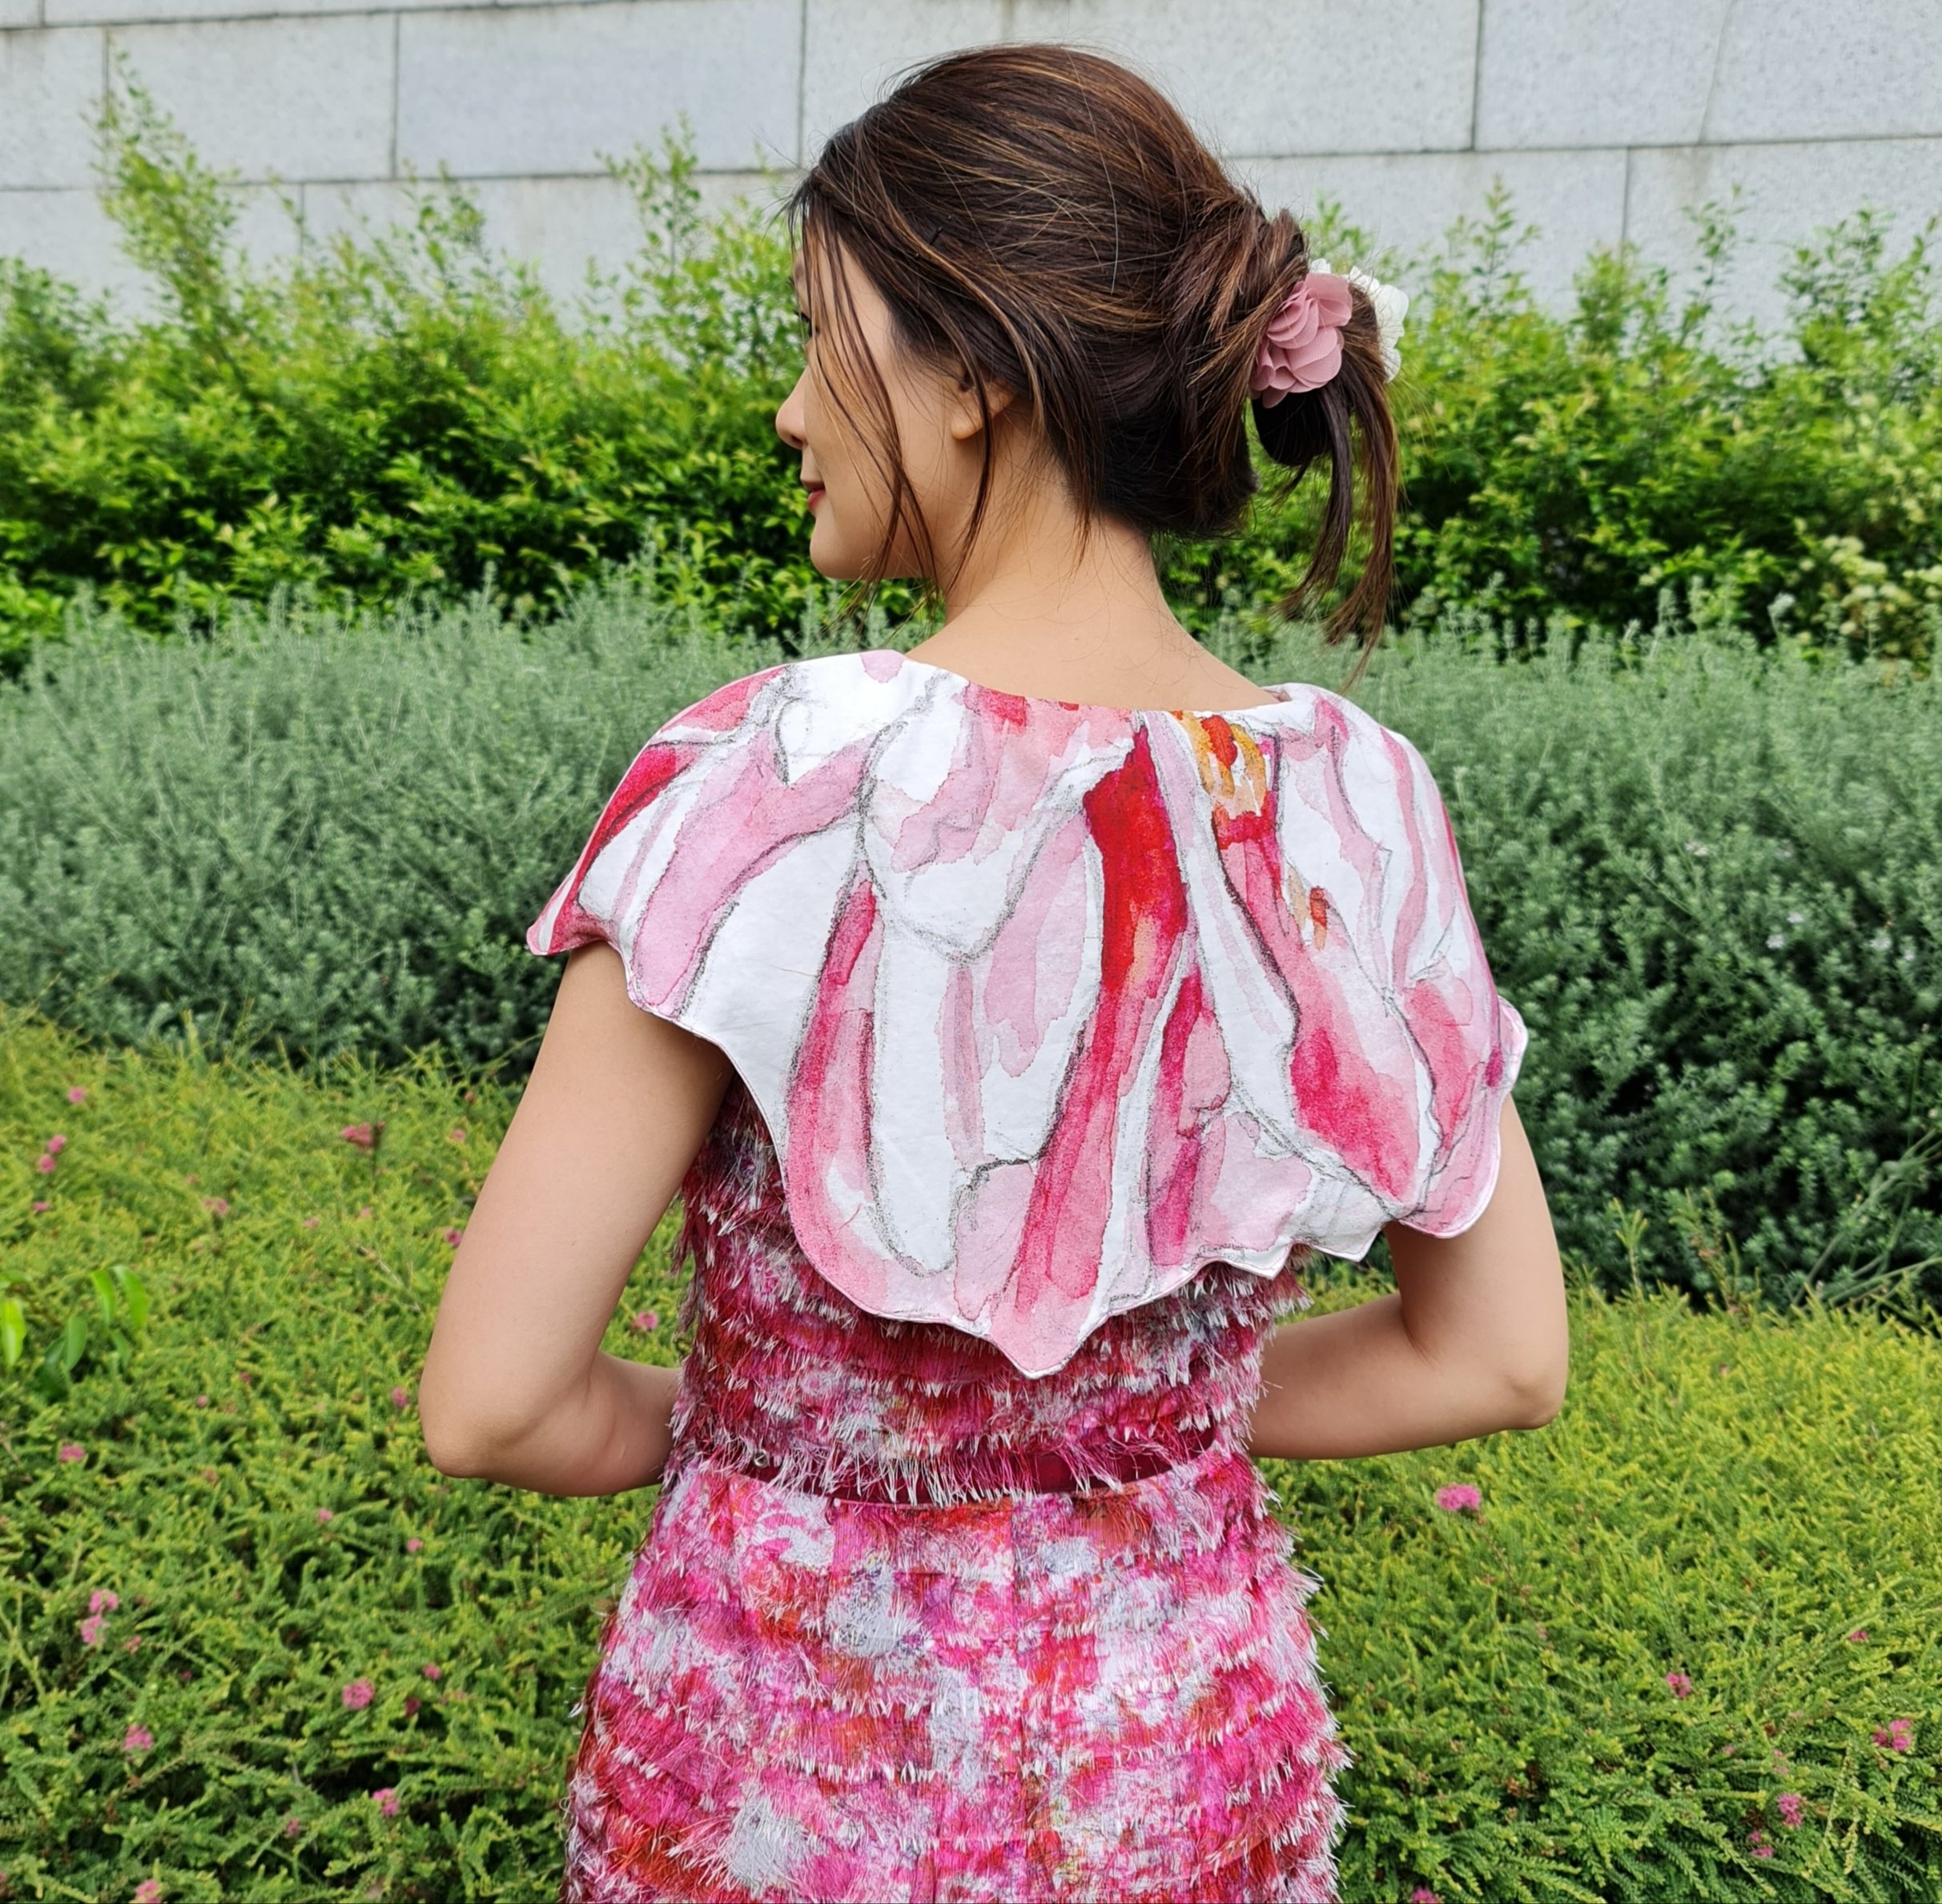
With the cape back folded up like the photo below, I think I have accomplished a Peony Flowerhead (Flower neck?) and fit into my original inspiration and vision. Morph bodysuit excepted.

Peony Head!
I hope we all have a fantastic New Year, and however 2021 had been to us, we march into 2022 with renewed energy and vigour. And happy sewing!
Sil (@mauve.cloud.studio)
Thank you so much Sil for sharing this amazingly creative dress project!